Revitalize Your Body: 7 Essential Postpartum Yoga Poses For New Moms
As a new mom, it’s important to make time for self-care. Practicing postpartum yoga poses is an awesome way to care for your body after birth and feel more like yourself again.
Post pregnancy yoga poses not only help speed up physical recovery, but also help to improve your mental health after birth, and reduce the chances of developing postpartum depression¹.
In this article, we will explore 7 essential postpartum yoga poses designed to help you regain strength and revitalize your body at your own pace. I’ll also share details about my experience with postpartum yoga as we dive into this journey together!
Disclaimer: I am not a medical professional. Please consult your physician before attempting any exercise. Cover Photo by Avrielle Suleiman on Unsplash
Table of Contents
Understanding the Benefits of Postpartum Yoga
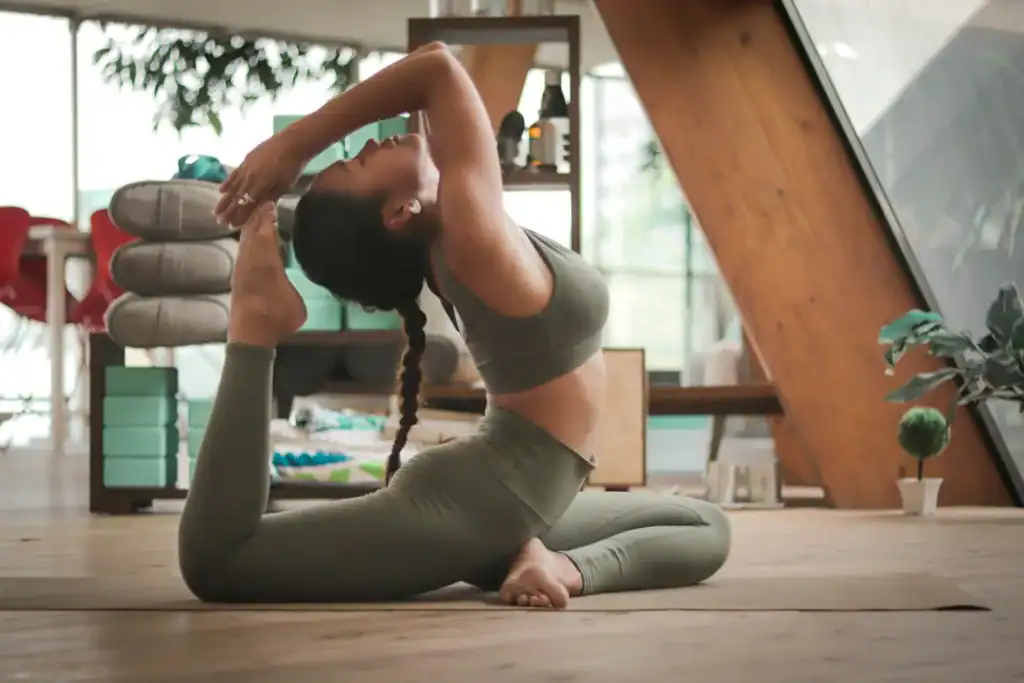
We often overlook many benefits of starting a postpartum yoga routine. As I mentioned before, practicing postpartum yoga poses is associated with a decreased risk of postpartum depression! Also, postnatal yoga can improve your quality of life and overall mental health¹.
You can use a postpartum yoga routine to improve your posture. This is done by addressing the strain put on your neck, back, and hips during pregnancy and while caring for a newborn.
If you are currently breastfeeding, you may experience “nursing neck”. This is neck pain caused by bending over your newborn while feeding them.
I experienced nursing neck, and it made breastfeeding much more challenging. Using postpartum yoga poses, you may be able to improve and even completely alleviate this type of pain.
Lastly, postpartum yoga can be a crucial tool for social support. When you attend a class or follow along with an online community, you open the door for opportunities to connect with fellow postpartum moms.
A sense of community will help remind you that you are not alone in this new journey. By integrating postpartum yoga into your routine, you can holistically support your transition into motherhood.
My Positive Experience With Postpartum Yoga Poses
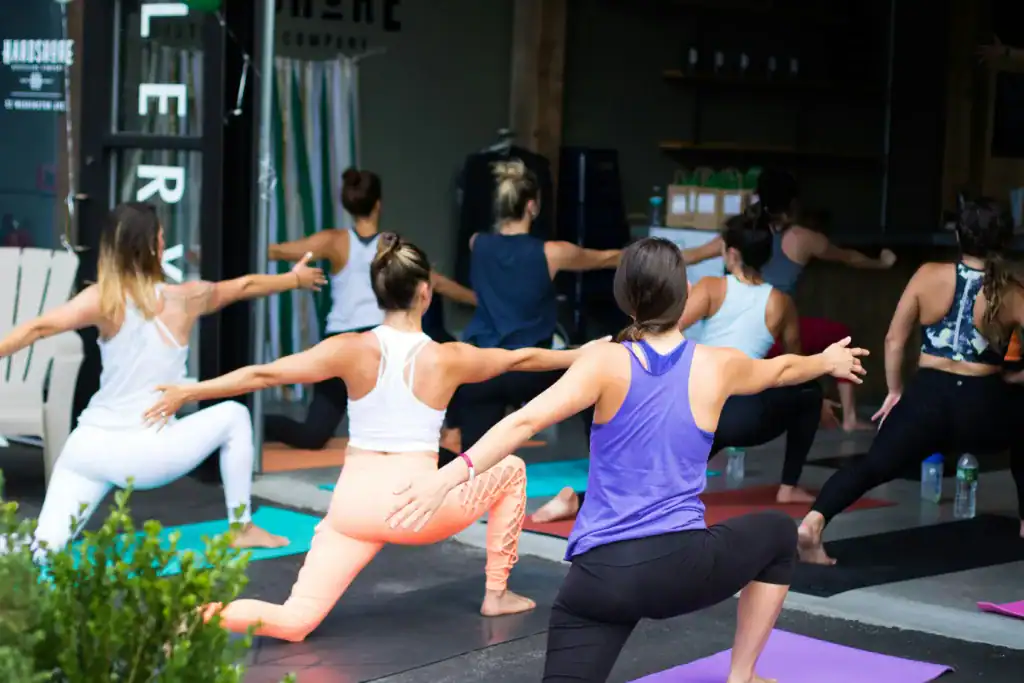
If I had known about these benefits when I was freshly postpartum, I would have been much more likely to start practicing postpartum yoga poses.
Throughout my pregnancy, I heard about how stretching and practicing yoga would improve labor and speed up recovery after birth. I stayed committed to doing yoga poses during pregnancy, but quickly stopped doing them after birth.
Now that my son is nine months old, I am finally getting back into the routine of working out and completing a postpartum yoga routine.
It’s only been two weeks since I started, but I am already reaping the benefits. I feel energized and also empowered to become a stronger and healthier mom. Click here if you want to learn more about how I created a postpartum fitness routine.
When to Start Practicing Postpartum Yoga Poses

It is essential to begin postpartum yoga only when you are ready. Generally, health care professionals recommend that you wait until at least six weeks postpartum to start any new form of exercise. This period allows you to recover from the process of birth. However, it is important to consult your healthcare provider, since recovery times can vary, especially if you had a C-section.
If you had a uncomplicated vaginal delivery, it may be fine to start some gentle postpartum yoga poses within a few days after birth if you feel up to it². The key is that the exercises are gentle and low-impact. You do not want to stress your healing body!
Whenever you start your postpartum yoga routine, make sure that you start slow and gradually build up to more intense forms of exercise. You want to ease back into physical activity to reduce your risk of injury. That’s the last thing you want as a new mom! By remembering that postpartum recovery is a marathon, not a sprint, you will set yourself up for success.
Essential Precautions For New Moms

Safety should be your top priority when easing back into fitness after having a baby. You should be aware of your body’s limitations and avoid pushing yourself too hard. There are some workout poses that you should avoid postpartum.
Any form of postpartum exercise that places tension on your abdomen should be avoided. After pregnancy, your body needs time to heal those muscles, and they are especially vulnerable to further weakness³.
Some examples of exercises that put tension on your abdomen are situps, full planks, and pushups.
Hydration and nourishment also play a vital role in supporting your postpartum recovery. Making sure you are hydrating before, during, and after your postpartum yoga routine is essential to staying safe.
Remember that proper nutrition and hydration will set you up for success in this journey of postpartum fitness.
Top 7 Postpartum Yoga Poses
The following yoga poses are gentle and beginner-friendly. and postpartum-approved. They focus on areas new moms often need help with: back pain, tight hips, weak core, and stress relief.
Remember to breathe deeply and move slowly as you try each postpartum pose. You can do all of them as a sequence (perhaps after feeding the baby and when you have a little calm moment!), or just pick a few that feel good for you.
1. Child’s Pose (Balasana)
Child’s Pose is a restful kneeling pose that gently stretches the lower back, hips, and thighs.
It’s often used as a yoga pose for postpartum recovery, and for good reason: it helps release tension in the back and shoulders, and encourages a deep sense of relaxation. I love using this postpartum yoga pose to relax. It’s also a great go-to when you need to relieve back pain or stress.
How to Do It:
1. Kneel on your mat with your knees about hip-width apart (you can keep them closer or wider as comfortable). Bring your big toes together behind you.
2. Sit your buttocks back towards your heels. If you’re very tight or this is uncomfortable, place a pillow or folded blanket between your thighs and calves for support.
3. On an exhale, fold forward from your hips, draping your torso over your thighs. Allow your forehead to come to the mat (or rest it on a cushion if it doesn’t reach).
4. Stretch your arms out in front of you, palms on the floor, or alternatively, let your arms relax by your sides. Do what feels most relaxing for your shoulder; reaching forward gives a nice stretch to the upper back, while arms back can be more calming.
5. Close your eyes and breathe deeply. With each inhale, feel your back expand; with each exhale, imagine tension melting away from your lower back and hips. Stay here for as long as you like. I’d aim for at least 5–10 slow breaths.
Tips: If your belly is uncomfortable when folded (especially if you’re still healing or if you had a C-section), widen your knees more to give your torso space, or use a bolster/pillow under your chest for support.
You can also place a small pillow under your head if the floor feels too far. This pose is meant to be completely comfortable, so adjust as needed. To come out, put your hands in and slowly rise (head comes up last to avoid dizziness).
2. Cat-Cow Stretch (Marjaryasana/Bitilasana)
If you could only pick one stretch for your spine, Cat-Cow might be it. This is a dynamic duo of poses. You start with Cat (rounded back) and then move on to Cow (arched back).
It’s fantastic for postpartum posture and back pain relief. After days and nights of feeding and cradling a newborn, many moms end up with a stiff back and an achy neck. Cat-Cow to the rescue!
This gentle moving stretch releases back tension and helps you regain good posture and balance. This is one of those postpartum yoga poses that I love since it feels so relaxing.
How to Do It:
1. Start on your hands and knees in a tabletop position. Align your hands under your shoulders and knees under your hips. Keep your back flat and neutral to begin with. You may want to pad your knees with a folded blanket for comfort.
2. Inhale into Cow Pose: Tilt your pelvis so that your tailbone sticks up and your belly lowers (think of dropping your stomach down). Lift your chest and gaze up slightly. Your back will naturally arch (concave). This is Cow. Feel the stretch in your belly and the openness in your chest.
3. Exhale into Cat Pose: Now tuck your tailbone under, engaging your abs slightly as you round your back like an angry cat. Press through your hands, tuck your chin toward your chest, and feel the stretch along your spine. This is Cat. You’ll feel your shoulder blades separate and your back broaden.
4. Continue to flow: Inhale, moving into Cow (arching gently, belly down, heart forward), then exhale into Cat (rounding spine, belly in, head down). Move with your breath, at your own pace. Repeat for about 5-10 rounds of breath.
Tips: Make the movement as big or small as feels good. In early postpartum, you might keep the range of motion mild (especially if you have abdominal soreness or diastasis, don’t let your belly sag too much in Cow.
Focus on the sensation of each vertebra moving. This stretch can help combat “mom posture” by alternating between spinal extension and flexion. If your wrists are tender, you can do Cat-Cow on your forearms or fists, or even do it seated (inhale arching forward, exhale rounding back). Remember to keep breathing deeply.
3. Bridge Pose (Setu Bandha Sarvangasana)
Bridge Pose is a wonderful, gentle strengthener for the lower body and core, and it has a few postpartum-specific perks. Lying on your back and lifting your hips, you’ll engage your glutes, hamstrings, and lower back.
These muscles can greatly benefit from strengthening after pregnancy. Bridge can also help re-engage the pelvic floor (imagine a kegel at the top of the pose) and stretch the front of the hips, which get tight from all that sitting and feeding.
Many experts recommend a supported or modified Bridge for new moms: for example, placing a yoga block or pillow between your thighs to squeeze can help tone the inner thighs and pelvic floor. You can even slide a pillow under your sacrum for a supported bridge, turning it into a restorative pose.
How to Do It:
1. Lie on your back on your mat (place a folded blanket under your shoulders if you like extra cushioning). Bend your knees and place your feet flat on the floor about hip-distance apart. Walk your feet in toward your buttocks until your fingertips can perhaps graze your heels (distance isn’t super critical, just comfortably close).
2. Let your arms rest at your sides, palms down. Take a breath. As you exhale, press through your feet and slowly lift your hips off the floor. Lift until you form a straight line from your knees to shoulders (or as high as comfortable). Avoid flaring your ribs up; keep your chest soft.
3. At the top, gently draw in your belly (like hugging your baby from the inside) and engage your pelvic floor (a subtle kegel). This will protect your back and target the right muscles.
4. Hold for a few breaths. You should feel your thighs, glutes, and lower back working. Make sure your knees don’t splay out; keep them aligned forward.
5. To release, exhale, and slowly lower your spine back down to the mat, vertebra by vertebra. Take a moment and perhaps rock your knees side to side to neutralize your back.
Tips: If you feel pressure in your head or neck, check that you’re not turning your head in the pose (keep looking straight up) and that your shoulders are relaxed. If your back feels strained, don’t lift as high, or try the supported version: slide a firm pillow or yoga block under your pelvis once you lift up, and let your weight rest on it.
4. Legs Up the Wall (Viparita Karani)
Sometimes the best pose is one that requires minimal effort. This pose is exactly what it sounds like: you lie on your back with your legs resting up against a wall. It is deeply restorative and often a favorite in postpartum recovery plans.
After birth, many women experience swelling in the feet or just general fatigue in the legs (those late pregnancy days are hard on the veins!). Elevating your legs helps reduce swelling and improves circulation. It’s also an inversion which encourages blood flow back to the heart and has a calming effect on the nervous system.
Legs Up the Wall can be your go-to when you’re exhausted but still want to do something beneficial for yourself. It’s like an instant relaxation button.
How to Do It:
1. Find an open wall space. Sit with one hip against the wall and your legs bent to the side. Then gently swing your legs up onto the wall as you lower your back to the floor. Scoot your bottom forward until it’s right against or very close to the wall. Your legs will be extended upward, resting on the wall.
2. Let your arms relax out to your sides, palms up, or rest them on your belly. Ensure your shoulders and head are resting comfortably on the floor (use a small pillow under your head if needed).
3. Close your eyes and breathe slowly. Relax into the pose for 1-5 minutes.
4. You should feel a gentle stretch in the backs of your legs. If your hamstrings are very tight, you can keep a slight bend in your knees.
5. To come out, bend your knees, roll to one side, and take your time getting up (you might feel a headrush if you sit up too fast).
Tips: You can modify the distance from the wall to change the stretch intensity. For extra lower back support, some people like to place a folded blanket or a yoga bolster under their hips (creating a mild pelvic lift). This can feel nice on the lower back and also add to the inversion effect.
Legs Up the Wall is wonderful for relaxation. If you find yourself with just a few minutes while the baby naps, get those legs up the wall and recharge! This is such a fun postpartum yoga pose.
5. Cobra Pose (Bhujangasana)
Cobra is a gentle backbend that can work wonders for a tired upper back and tight chest. We’ll focus on a low cobra variation, keeping the bend mild. When done with proper engagement, Cobra can alleviate upper-back knots and even give you a subtle energy boost.
How to Do It:
1. Lie on your belly with your legs extended back. Place your palms on the floor under your shoulders, elbows bent and pointing backward.
2. Press the tops of your feet and your pubic bone gently into the floor. This grounds your lower body.
3. Inhale and slowly lift your chest and head up, leading with your chest (not your chin). Use your back muscles more than your hands at first. Your hands are there to support, but try not to do a giant push-up. Keep your lower ribs on the floor. This is a low Cobra; make sure your back is doing the work.
4. Draw your shoulder blades together and down your back, opening through the collarbones. Gaze slightly forward or down (don’t crank your neck up). You should feel a nice stretch in your chest and a contraction in your mid-back.
5. Hold for a breath or two. Exhale and slowly lower back down, turning your head to one side to rest or stacking your hands under your forehead. Repeat 2-3 times if it feels good, moving with your breath (inhale up, exhale down).
Tips: Keep the engagement in your core even as you lift. It’s a fine balance: you want to strengthen the back but without crunching the lumbar area. A small lift (even just a few inches off the ground) is enough in early postpartum.
6. Seated Forward Bend (Paschimottanasana)
A calming forward fold, done sitting, can help release tension along your entire back and body. However, as a new mom, you must approach Seated Forward Bend with care: avoid deep forward bends (I still can’t do them!) if you still have abdominal tenderness or a very weak core.
How to Do It:
1. Sit on the floor with your legs extended straight in front of you.
2. Inhale and sit up tall, reaching your arms overhead and lengthening your spine.
3. Exhale and hinge forward from your hips, leading with your chest. Imagine your belly moving towards your thighs rather than your nose toward your knees (this keeps the spine long). Only go as far as comfortable; you might place your hands on your shins, ankles, or feet (or use a strap around your feet to gently hold).
4. Once you’ve reached a gentle stretch in the back of your legs and perhaps your lower back, you can let your spine round a bit and relax your neck.
5. Hold for 5-10 breaths, or as long as it feels good. With each inhale, slightly lengthen the spine, and with each exhale, see if gravity allows you to drape a tiny bit further (don’t force it!).
Tips: Keep those knees soft. You might even put a rolled towel under your knees if that helps. The point is not a perfectly straight-legged postpartum yoga pose, but to get a nice stretch.
7. Warrior II (Virabhadrasana II)
Time to awaken your inner warrior! Warrior II is a classic standing pose that exudes strength and stability. It might seem like a surprising addition to a gentle postpartum routine, but it’s actually fantastic for building endurance in the legs and gently engaging the core.
I find this pose really fun, even if it feels a little silly. Just be mindful not to push too far if you still have joint laxity; take a narrower stance if needed.
How to Do It:
1. Start standing upright. Step your feet wide apart, about 3-4 feet distance (adjust based on your height and comfort). Turn your right foot out 90 degrees so it faces the top of your mat (or whatever space you’re using) and turn your left foot slightly inward (about 30 degrees). Your front heel should align roughly with the arch of your back foot.
2. Bend your right knee so it’s directly over your right ankle (lunge position). Aim to get that front thigh near parallel to the ground, but only go as low as you feel stable. Your left leg stays straight and strong.
3. Raise your arms to the sides at shoulder height, parallel to the floor, reaching actively from fingertip to fingertip. Turn your head to gaze over your right fingertips. You are now in Warrior II.
4. Check your posture: shoulders over hips, not leaning forward. Relax your shoulders away from your ears. Engage your core gently (imagine pulling your belly in an inch) to support your lower back.
5. Hold for 5-8 breaths.
6. To come out, straighten the front knee, lower your arms, and pivot your feet back to parallel. Take a moment and then repeat on the left side (left foot turns out, right foot turns in, bend left knee, etc.), holding for an equal number of breaths.
Tips: If your balance feels off, practice near a wall, since you can touch it with your back hand for stability. Keep the bent knee tracking toward the middle toes (don’t let it cave inward). If your arms get tired, you can rest them briefly. Remember to breathe; sometimes, in strong postpartum yoga poses, we hold our breath.
Final Thoughts
Mama, as you step (or tiptoe) into this new chapter of life, remember that taking care of yourself is not a luxury, it’s a necessity.
Postpartum yoga poses are one beautiful way to practice that self-care, giving you space to heal, breathe, and reconnect with the strong woman you are. Through the gentle poses and stretches, you’re not just toning muscles or increasing flexibility; you’re sending love to a body that has done incredible work.
As you practice these top 10 poses and breathing techniques, go at your own pace. Some days you might zip through the whole sequence feeling energized; other days you might roll around on the mat with the baby and call it a day. It’s all okay. If there’s one thing yoga (and motherhood) teaches us, it’s to be present and patient. Progress might feel slow, but trust that every little bit counts. One morning, you’ll realize your back aches less, or your mood lifts more easily, or you’ve finally touched your toes again. When this happens, you’ll have these small, consistent efforts to thank.
Do you want more information on how to glow-up postpartum? We talk about it a lot here! Here are five realistic ways to glow-up postpartum.
Sources:
- 1. Liu, Y., Huang, Y., Liu, F., Hu, C., & Yu, Y. (2024). Effects of postpartum yoga on maternal mental health and physical recovery: A systematic review and meta-analysis. Journal of Clinical Medicine, 13(2), 312. https://doi.org/10.3390/jcm13020312
- 2. Mayo Clinic Staff. (n.d.). Exercise after pregnancy: How to get started. Mayo Clinic. Retrieved from https://www.mayoclinic.org/healthy-lifestyle/labor-and-delivery/in-depth/exercise-after-pregnancy/art-20044596
- 3. Flores, B. (n.d.). Postpartum exercises to avoid. Postpartum Trainer. Retrieved from https://postpartumtrainer.com/exercises-to-avoid-postpartum/
- 4. Baratz, J. (2022). Postpartum yoga: How to get started & why it’s so beneficial. One Peloton. Retrieved from https://www.onepeloton.com/blog/postpartum-yoga




One Comment